Building the base
To keep it simple, the base is made out of recycled railway sleepers. I bought grade 1 sleepers measuring 2.4m x 125mm x 250mm. Using 3 layers would build the base up to a reasonable comfortable 75cm high – with hindsight a fourth layer would have been even better.
Railway sleepers are very heavy and covered in tar – so mind your back – they are definitely a 2 person lift! I used a chainsaw to cut mine – 6 pieces 125cm long and 6 pieces 95cm long – my chainsawing is not millimetre accurate! The guy that delivered them said the tar can clog the blade, so keep a can of WD40 handy – thankfully, I didn’t have any problems with my trusty Ryobi Chainsaw*
I then built up the base layer by layer, alternating the long and short side for extra stability. I tried using some really long decking screws to hold it together, but screwing into the end grain didn’t work. So I used some battens at each corner with 2″ screws to hold it nicely together. It took a few goes to get it pretty level and to have the best side up at the last layer. New sleepers are only a few quid more and in my view would be worth the investment!
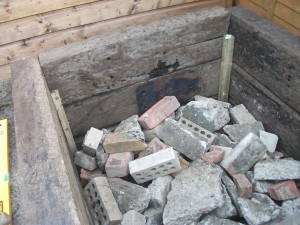
I filled the box to just below one brick height, bashed it down with a sledgehammer and then poured in a wheelbarrow of 14mm gravel I had left over from a path. I then tipped in 2 bags of building sand and smoothed it all out. I made the plinth in a straight pattern, starting alternate rows with a half brick or full brick and ensuring that was a level as possible. I used a club hammer to tap them in close and down into the sand bed. After a couple of goes I had made a level bed and was ready for the next step!
Next Step – the first layer


